Search This Blog

Showing posts with label Cakes. Show all posts

Tuesday 1 January 2013

Custard Powder Bundt Cake ~ Egg less Yellow Cake With Chocolate Ganache


A very happy new year to all my fellow bloggers and my blog readers. May the new year bring you lots of happiness, prosperity and good health!

I have been away from this space for over a month now. Actually, I have shifted places and am now settling down slowly in a new city. There was a lot happening on the home front that blogging took a back seat. I will try to blog more frequently from now on. Today, I have something sweet to share from my drafts. I had made this cake quite some time back for our girls get together.

So lets start the new year on a sweet note!


 Recipe Source: Divine Taste 
 
Custard Powder Bundt Cake ~ Egg less Yellow Cake

Ingredients:
1 cup milk
1 cup granulated sugar
1 1/2 cups plain flour
1/2 cup vanilla custard powder
2 tsp baking powder
1/4 tsp baking soda
1 tsp vanilla extract
1/2 cup butter

Process:
1.      Grease a bundt tin or a 8” round tin and lightly dust it with plain flour. Tap to remove excess flour from the surface of the pan. Preheat the oven at 160 C.
2.      In a large bowl shift all the dry ingredients except sugar.
3.      In a separate bowl whisk butter and sugar till soft and fluffy. Add in room temperature milk and whisk till well incorporated.
4.      Add the dry ingredients to the wet ingredients and mix well with a whisk until there are no lumps.
5.      Pour the batter into the prepared tin and bake at 160 C for 45 minutes to 55 minutes, until a skewer comes out clean.

For the ganache:

50 ml cream
50 gm chocolate chunks

1. Add both the ingredients in a microwave safe bowl and heat for a minute. Stir till you get a smooth silk ganache.

Pour it over the cake once the cake is fully cooled. I had poured it while the cake was still a bit warm( was in a hurry). So, the ganache melted and dripped down ;(

Note: The cake taste best when eaten on the same day. Later it tends to get dry.

Thank you for stopping by! Cheers!

Saturday 15 September 2012

Egg less Red Velvet Cake

Past few days in India has been hectic. I had been hoping to be able to blog from here, but was caught up with so many different things that, in the end blogging took a back seat. Today, I decided to give my blog a visit and found there are a few drafts which could be posted with a little effort. Of course, I do not want you guys to forget me while I am away from this space.

While I know I am posting two decadent sweets one after another, I really cant help it. The cake I am sharing today is the one I baked for my DH's birthday last month. I was hoping I would be able to post it sooner, but couldn't. I decided to post it on my birthday which was a couple of days back but, couldn't.really manage to do even that. So, today to break my long absence from blogging, I want to virtually treat you all with this Red Velvet Cake!


Birthdays are special. So, I like to bake something special. This Egg less Red Velvet Cake is also a result of such efforts. The cake was not as red as I would have like and I later felt I could another table spoon of the red colour. But, after it was iced and cut, the red looked reasonably good in contrast with the white icing. I actually forget to take a picture of a slice, so pardon me for that.

This article on wiki gives a synopsis of the history of this special cake. Since this cake is egg less I have deviated a lot from the way that cake is traditionally make. But for an egg less cake, the results were pretty good. Lets see how I made it.


Ingredients:

11/2 cup + 2tbsp plain flour +1tbsp cocoa powder
2 tsp baking powder
1 tsp baking soda
1tin condensed milk
1/2 cup butter, at room temperature
1/2 cup yogurt + 1/2 cup water
2 tbsp red colour (add another tbsp for a brighter red colour)
1tsp vanilla extract
1tsp apple cider vinegar

Process:

1. Preheat the oven at 160 C. Line a 9" round tin. Please note that baking time may vary if you choose a smaller or larger tin. So, adjust accordingly.

2. Shift the flour, baking powder and baking soda twice. Set aside.

3. In a large bowl whip the condensed milk and butter till the mixture is creamy. Add the red food colour and whisk again.

4. Add the flour mixture to the creamed mixture in 2-3 parts. Keep stirring while adding flour mixture. Add butter milk, vinegar and whisk for another 2 minutes. The batter will have a pouring consistency. Don't over do it

5. Pour the batter in the prepared tin and bake it in the preheated oven for 30 minutes at 160 C. Then lower the temperature to 150 C and bake for another 15-20 minutes.

6. The cake is done when a skewer inserted in the middle comes out clean. Cool for at least 15 minutes before turning the cake out of the tin.Cool completely before icing the cake.

Mascarpone Cream Icing:

280 gm mascarpone cream
225 gm whipping cream
3/4 cup icing sugar

Pour all the ingredients in a large bowl and whip it till it is creamy and has a soft peak consistency. Chill it in the fridge for half an hour.

Assembling the cake:

Slice the cake in 3 layers. In a cake plate place the top most layer and spread the prepared icing in an even layer. Top it with the second and third layer in the same way and cover the whole cake with rest of the icing. Get creative with decorating the cake. I used piped border, glace cherries and chocolate hearts. You can do it the way you fancy!


I will definitely try to blog more often. I have read a few books and I will post the reviews soon. Stay tuned.
Thank you for stopping by! Cheers!

Friday 27 April 2012

Egg less Vanilla Cake (With Condensed Milk and Coke)

It has been a while since I shared a cake recipe here. I do bake often but not all get posted here. I had clicked these pictures quite a while back. Only now it is making its way to this space. When ever I have a cake craving, it is usually for chocolate cake or a brownie. But, DH loves plain vanilla cake. So, when ever he requests me for a cake, it is plain vanilla only. Anything else should come with an icing.

I make the plain vanilla cake in a couple of ways, sometimes with yogurt, sometimes with vinegar. But, my favorite way is with condensed milk. So, if I have condensed milk can at home, I go this way.
There are many recipes floating around the web for a cake with condensed milk. Even, I remember my mom making  cakes with condensed milk. I can say it is the most traditional way of making egg less cakes. For the liquid content of the cake, I like to use coke or soda water. It really makes a difference to the texture of the cake. However, it can be replaced by milk or water if you don't have aerated cold drink at hand.

Eggless Vanilla Cake (With condensed milk and coke)

11/2 cup AP Flour
2 tsp baking powder
1 tsp baking soda
1/2 cup soft butter
1 tin sweetened condensed milk (400gm)
2/3 cup coca cola at room temperature.
2 tsp vanilla extract

Butter and flour for greasing and dusting the pan


Process:

1. Preheat the oven at 180 C. Line a 9" square tin. Please note that baking time may vary if you choose a smaller or larger tin. So, adjust accordingly.

2. Shift the flour, baking powder and baking soda twice. Set aside.

3. In a large bowl whip the condensed milk and butter till the mixture is creamy.

4. Add the flour mixture to the creamed mixture in 2-3 parts. Keep stirring while adding flour mixture. Add the coke in the end and whisk for another 2 minutes. The batter will have a pouring consistency.

5. Pour the batter in the prepared tin and bake it in the preheated oven for 15 minutes at 180 C. Then lower the temperature to 160 C and bake for another 25- 30 minutes.

6. The cake is done when a skewer inserted in the middle comes out clean. Cool for at least 15 minutes before turning the cake out of the tin. Slice and enjoy!


Notes:
1. Add the aerated drink at the end only and be fast in pouring it into the greased pan and get baking.
2. Aerated drink can be replaced by room temperature milk or water. But, I find aerated drink gives a lighter texture to the cake.
3. If you are using a smaller pan, it make take longer to bake it. Similarly, if using a larger pan, it will get baked quicker. So, adjust accordingly and keep an eye.

Linking it to Bake Fest #6. This event is the brain child of Vardhini.

Thank you for stopping by. Cheers!

Friday 2 March 2012

Eggless Coconut Cake


Egg less Bakes is a group started by Gayathri and for the first edition she chose a egg based coconut cake recipe. All the participants had to try out an egg less version and post it on their blog on a specified date. To know more about it and participate, check this.

I have made a lot of changes to the original recipe. I have halved the recipe and have substituted half of the flour with whole wheat flour, butter with oil and have used a combination of yogurt, baking soda and coconut milk to substitute the eggs. Lets hop to the recipe to see how I have made it.

Ingredients:

1/2 cup AP Flour
1/2 cup whole wheat flour
1 tsp baking powder
1/2 tsp baking soda
1/2 cup + 2 tbsp caster sugar
1/2 dessicated coconut
1/4 cup yogurt
1/4 cup oil
1/2 cup coconut milk
1 tsp vanilla essence


Process:

1. Preheat the oven at 175 C and grease and dust a 7" square pan.
2. In a large bowl sieve the flours, baking powder, baking soda.
3. Add sugar and dessicated coconut and whisk such that the mixture is uniform.
4. Make a hole at the centre of the mixture and add all the wet ingredients one by one and whisk till the batter is well incorporated. Do not over beat. The batter consistency is on the thicker side, yet of pouring consistency.
5. Bake it at 175 C for 35- 40 minutes till a tooth pick inserted comes out clean.
6. When baked, let it sit over 15 minutes and then invert it on a wire rack. When it cools completely slice and serve.

The cake had a slight crust, but was soft inside. The coconut flavour was good although freshly grated coconut will give a more prominent flavour. All in all I am satisfied with the results as far as texture is concerned. But the cake was a little less sweet and the coconut flavour was not as prominent as I would have liked. So next time I make it I would like to use 1 cup of freshly grated coconut and increase the sugar to 3/4 cup.

Thanks for stopping by. Cheers!

Sunday 25 December 2011

Heartiest Christmas Wishes with Chocolate and Dates Cake (Eggless)

At the very outset my heartiest wishes to all who celebrates Christmas. Wish you a very merry and fun filled Christmas!
Whether you celebrate this festival or not, you can't miss the festivity in the air and of course good food is all a part of the festive spirit. As everybody, I can't miss the opportunity to indulge in something delicious and of course baking comes to my mind.


I made this cake for a small get together at a friend's place. I was received well by my friends and in fact my DH also gave a thumbs up to it even though he is not a very big dates fan. The taste of dates is very subtle and in this particular cake it helps to accentuate the chocolate flavour. This recipe actually comes from one of my friends. I have only experimented a little by adding cocoa to it. 
 
Without much ado let's hop to the recipe:

Ingredients:

1 cup minus 2 tbsp AP Flour
2 tbsp cocoa powder
1/2 cup castor sugar
1/2 cup pitted dates(About 15-18 soaked in water for 2-3 hours or overnight).
1 tsp baking powder.
3/4 tsp baking soda.
1/4 cup melted butter.
1/4 cup water used for soaking dates.
1/2 cup milk.
Process:

1. Grease a 6'' square cake tin and preheat the oven at 180C.
2. Churn the dates along the water and milk to make a smooth paste.
3. Shift flour, baking powder, soda 2-3 times together so that it is well blended.
4. Cream in the sugar and butter till well incorporated and fluffy.
5. Slowly add the dry ingredients to the wet ingredients whisking all the time.
6. Whisk till the batter is smooth, around 2-3 minutes.
7. Pour into the pre greased tin and bake at 180 C for 20 mins and then lower the temperature to 160 C and bake for another 15-20 minutes or until a skewer inserted in the middle comes out clean.
8. Let it rest in the tin for 5-10 mins before turning it on a wire rack to cool.
9. Cool completely and slice. Serve.

Thank you for stopping by! Merry Christmas! Cheers!

Tuesday 22 November 2011

Celebrating one year of 'Pages' with Eggless Black Forest Cake!

Time flies. It really does. Some times this realization hits me with a bang and makes me nervous as each seconds trickles away. On other occasions, it is a time to rejoice, to celebrate. Today's occasion falls in the later category. It is my blog's birthday! It was sometime in November last year I created this blog but, it was the 22nd of November when I wrote the first post. So that is the day for me.

So here are my wishes- 

Happy Birthday Blog! I am so glad I created you. 
Through you, I am able to show case to the world what I love to do,
Through you, I have come to know so many like me,
Who like to seek happiness in the simplest things,
Like sharing thoughts on books, food or everyday tales,
Through you I have discovered a new world. 
So, thank you dear blog and I hope we continue on this journey for years to come.


To celebrate this special occasion, I have something special to share today! Black Forest Cake! I had prepared it for by DH birthday, but didn't get to post it. Today is the perfect day to share this sinfully delicious cake. To know a little history of this German dish read THIS. This is off course not a very traditional recipe as it is tweaked to be made egg less. I have made it a couple of times and have  followed the recipe from a Nita Mehta's cook book.

Typically, Black Forest cake consists of several layers of chocolate cake, with whipped cream decorated cherries, and chocolate shavings. So first we need to prepare a chocolate cake.


Eggless Chocolate Cake:

Ingredients:

400gm condensed milk.
1 cup milk.
2 cup AP flour.
½ cup powdered sugar.
½ cup cocoa powder.
1 cup oil.
2 tsp baking powder.
1 tsp soda bicarbonate.
2 tsp vanilla essence.

Process:

1. Grease a 9 inch round baking tin and dust it nicely with flour. Preheat the oven at 175 C for 10-15 minutes.

2. Sieve flour, cocoa, baking powder and soda bi-carb together. Keep aside.

3. Beat oil, sugar and essence till well mixed. Add condensed milk and milk. Beat well till well incorporated.

4. To this mixture add flour mixture in 2-3 batches, mixing well all the time. Beat well for 4-5 minutes till the mixture is light and fluffy and of a soft dropping consistency. Add a few spoons of milk if needed.

5. Transfer the cake mixture to the prepare tin. Level it.

6. Bake it at 175 C for 50-55 minutes.

7. Insert a clean knife in the middle of the cake to check if it is done. If it comes out clean, switch off the oven and take the cake out. Remove from tin after 10-15 minutes, by inverting on the wire rack.

For the black forest cake we will need.

1 chocolate cake (From above).
150 gm glazed cherries.
1 tbsp rum (Gives the flavour, I encourage to use it or use rum essence).
2-3 tbsp sugar.
¼ cup water.

Cream Icing:

300ml double cream- chilled.
4 tbsp sugar or to taste.
Chocolate Decoration:
200 gm milk or semisweet chocolate, as per your taste.
Process:
1.   Chop the chocolate bar into small chunks and place them in a microwave safe bowl. Heat it in the microwave for 2 minutes in 4 steps of 30 seconds each. Stir every 30 seconds just to make sure chocolate doesn’t get burnt at the bottom and is evenly melted.
2.   Keep a parchment paper spread over a baking tray. Make sure it sticks to the tray, if needed use adhesive to make it stick. Spread the melted chocolate swiftly and evenly on the parchment paper. Let it rest for4-5 minutes is a relatively cool place so that the chocolate is firm enough to touch but not hard. Slice them into bars of equal sizes using a sharp knife. It is better to measure the height of the cake before spreading the chocolate and slicing it. Once sliced keep it in the fridge for 5-10 minutes till it is well set and gently take them off the parchment paper and store them in the fridge in an airtight container till needed.

Cream Icing and Assembling the cake:


Process:

1. Slice the chocolate cake evenly into 3 equal layers or more if you like. Place one half upside down on a flat plate.

2. Beat cream with sugar till the cream is thick and stands soft peaks. Keep it in the freeze till needed.

3. Dissolve sugar in water with rum. Thinly slice the cherries keeping aside 5-6 for decoration.

4. When the cake is completely cooled down, brush the sugar and rum syrup generously over the cake. The cake will soak it and will be moist. Spread a layer of cream over it evenly. Now spread a thin layer of sliced cherries.

5. Place the second layer of the cake. Brush with syrup generously and repeat the process of spreading cherries and then place the third and final layer and brush the syrup generously. Cover the whole of the cake with cream icing evenly.

6. Cover the cake sides with the prepared chocolate bars. Decorate the top with cream and cherries as desired.

7. Keep the cake in the freeze and take it out 15 minutes before serving

Thank you for stopping by! Cheers!

Sunday 11 September 2011

Eggless Vanilla Cupcakes ~ Happy Birthday To Me!

The post title announces that it is a special day! Well, one's birthday is indeed special and I do not mind announcing it myself to the world.

I am on my India visit now and I am not really doing any blogging these days. To tell you the truth, I really do not feel like sitting in front of the computer when there is so many other things to do, friends and relatives to meet, shopping and 101 little things that time seems like flying. How ever, today is an exception. So, today I am sharing a very easy cupcake recipe. I have tried it a couple of times and I can tell you this much, this recipe is a keeper. With simple ingredients, it is so easy to make.

The best thing about cupcakes is that every body gets an individual cake and not just a piece of cake. Here I attempted to do the icing with double cream. However, it is as good without the icing. This is a basic recipe and you can add your own variations by adding choco chips, dried fruits, glace cherries etc.

Eggless Vanilla Cupcakes:

3/4 cup plain milk
11/2 tsp white vinegar
1 1/4 cups AP Flour
1 tsp baking powder.
1/2 tsp baking soda
 1/4 tsp salt.
3/4 cup powdered sugar.
1/4 cup oil.
11/2 tsp vanilla extract.

Yields 12.
Process:
1. Preheat the oven to 180 C. Line a 12 cup muffin tin with paper. Set aside.
2. In a small bowl, combine the milk and vinegar and set aside. In a medium bowl, combine the flour, baking powder, baking soda and salt. Mix to combine.
3. In a large bowl, combine the sugar, oil and vanilla. Stir in the milk mixture. Add the dry ingredients to the wet ingredients and stir until smooth.
4. Pour the batter evenly into the prepared tin and bake for 20 minutes. The cupcakes are ready when a tooth pick inserted at the centre comes out clean. Cool completely before frosting.


For the frosting:

250 ml double cream.
1/4 cup icing sugar or more.
1 tsp vanilla extract
a few drops of food colour, optional.
Glace cherries, a few.

Process:

1. Add all the ingredients and whip it with a beater till it get stiff peaks.
2. Fill it in a icing bag and keep it in refrigerator for half an hour.
3. When the cupcakes have completely cooled, ice the cupcakes as you like. I used a star nozzle to make stars and swirls and with a few I made butterfly cupcakes.

These cupcakes were soft and moist. Try it once and I am sure you will make them again.
Thank you for stopping by. Cheers!

Friday 17 June 2011

Pineapple Chunk & Cardamom Cake (Eggless)

The recipe for today's post comes from my drafts. I had made it quite sometimes back and since then it had just been sitting in my drafts. I have made this one quite many times, mainly when I have some left over canned pineapples. If you love pineapples it will surely appeal to you. Adding cardamom adds an Indian flavour to it but if you do not like it, you can leave it out all together and you will have a pineapple chunk cake.

This recipe is adapted from Manjulas Kitchen. I have just tweaked the amount of butter and juice. It worked well and the cake was rich and moist. Instead of butter you can use equal amount of oil plus a little more pineapple juice.These pictures have not been able to capture the moistness and texture. I will update the post with better pictures next time I bake it. As for now, hop off to the recipe!


Ingredients:

1 1/4cup AP Flour.
1/4 cup butter,soft at room temperature.
3/4 cup condensed milk.
5 rings of canned pineapple cut into chunks.
3/4 cup of pineapple juice (from the pineapple can).
1 tsp baking powder.
1/2 tsp baking soda.
3 cardamom pod seeds powdered finely.


Process:

1.Take a deep bowl or container and put soft butter in it. Add condensed milk to it and whip it nicely with a wooden spoon or a hand mixer till it is light and well incorporated.

2. In a separate bowl add AP flour, baking powder, baking soda and powdered cardamom and shift.

3. Add the dry mixture to the wet mixture little by little stirring all the time.Add the pineapple juice little by little and whisk for another 5 minutes till it is mixed properly. Add a little more if needed. Add the pineapple chunks and fold it in the mixture.

4.Keep a cake tin greased with butter and dusted with flour ready before starting to make the cake batter. Pour the cake batter into it. Insert the cake pan into an oven preheated at 180 degree C. Bake the cake at 170 degree C for 40mins.

5. Using a skewer or knife check if the cake is done. Prick the skewer into the cake, if it comes out clear then the cake is ready.

6. Take the container out of the oven and let it cool for 10 mins. Take the cake out on a plate by turning the container upside down.

This pineapple cake is very moist and it tastes best when served cold.


Thank you for stopping by! Cheers!

Thursday 28 April 2011

Celebration Chocolate Cake With Fudge Frosting (Eggless)

Chocolate has a special place in my heart. The very thought of it sets my mouth water and so when it comes to baking a special cake, a 'Chocolate Cake' comes to mind at the very first instant. I have made it quite many times and it has always been a hit. I love this recipe because it is eggless (it has to be) and infact vegan(with no butter or dairy product, I mean just the cake not the frosting). I am not vegan, so I didn't go all the way to make a vegan frosting.

This cake recipe was passed on by a friend and I had jotted it down in a paper.I don't where I kept it but I know its somewhere safe ;-). So, I googled for one and found this. It is a very easy recipe with no fancy ingredients, even beginners can try it. I made it for our 3rd marriage anniversary and needless to say, it was a hit!

Here is the recipe:

(Click here for the printable version)
Ingredients:

11/2 cup AP Flour.
1 cup sugar.
3 tbsp cocoa powder.
1 tsp baking soda.
1/2 tsp salt.
5 tbsp oil ( I use sunflower oil)
1 tsp vanilla extract.
1 tbsp white vinegar.
1 cup water.

Process:

1. Preheat the oven at 180 C and grease two 8 inch round sandwich tins.

2. In a large bowl mix all the dry ingredients and shift so that it is well mixed and uniform. Make a hole in the centre.

3. Add the oil, vanilla extract and water and whisk it to combine it all. Add the vinegar and very quickly blend it lightly. Immediately pour the batter equally in the greased tins and bake in the preheated oven for 22-25 minutes.

4. To test if its done insert a skewer in the middle and if it comes out clean, cake is perfectly baked.

5. Take it out and run a knife through the sides of the cake and let it rest for 15 minutes to half an hour before taking it out of the tin.

6. Cool it completly before proceeding for the icing.

For the fudge frosting:

100 g milk chocolate (or dark chocolate or a combination of both)
1 cup icing sugar.
4 tbsp butter soft
5 tbsp milk or cream
1 tsp vanilla essence

Also required:

Sugar syrup made with a teaspoon of sugar and water

Process:

1.  Chop the chocolate into small pieces. Pour all the ingredients into a heat proof bowl and place it over a pan containing boiling water. Stir the ingredients as it melts. The bowl should not touch the water. Alternately, you can microwave the chopped chocolates till it melts.

2. Take it off gas once nicely melted and beat well. Once the cake is cooled completely, place one half upside down and brush it nicely with the sugar syrup. It will keep the cake moist.

3. Pour the freshly prepared icing and cover it quickly. Place the second half and pour rest of the icing working it quickly before it is cooled and starts settling.  With a warm palette knife smoothen it as quickly as possible.
For the decoration I used:

Grated chocolate, cocoa powder, chocolate hearts and chocolate lace border. That's a lot of chocolate I know but for a chocoholic like me its GREAT! :-) (huge grin)!!

For chocolate hearts, I made outlines of little hearts on a parchment/greaseproof paper and turned it upside down. In a handmade cone made from parchment paper or plastic, I filled melted chocolate and closed the other end. I cut a small peice of the pointed end off the cone and filled the heart oultines with melted chocolate and left them to set. Once set, I lifted them and kept them in refrigerator till needed for decoration.

I got the idea of lace border from here. Deeba's PAB is an inspiration for me and I am always awestruck by her pictures. This time the lace border was not that perfect, but I am sure it will be with practice.

Notes:

1. After adding the vinegar, do not beat the batter much or else it will not rise. You have to be real quick at this stage.

2. It can be baked in 1 large 8 inch line and then slit it in the middle. But, I prefer to bake it separately.

3. Greasing the cake tin properly before baking and letting the cake cool down before taking it out it is very important.

4. The cake tastes great with or without frosting. It can also be served warm (30 secs in microwave) with a scoop of vanilla icecream and chocolate sauce!

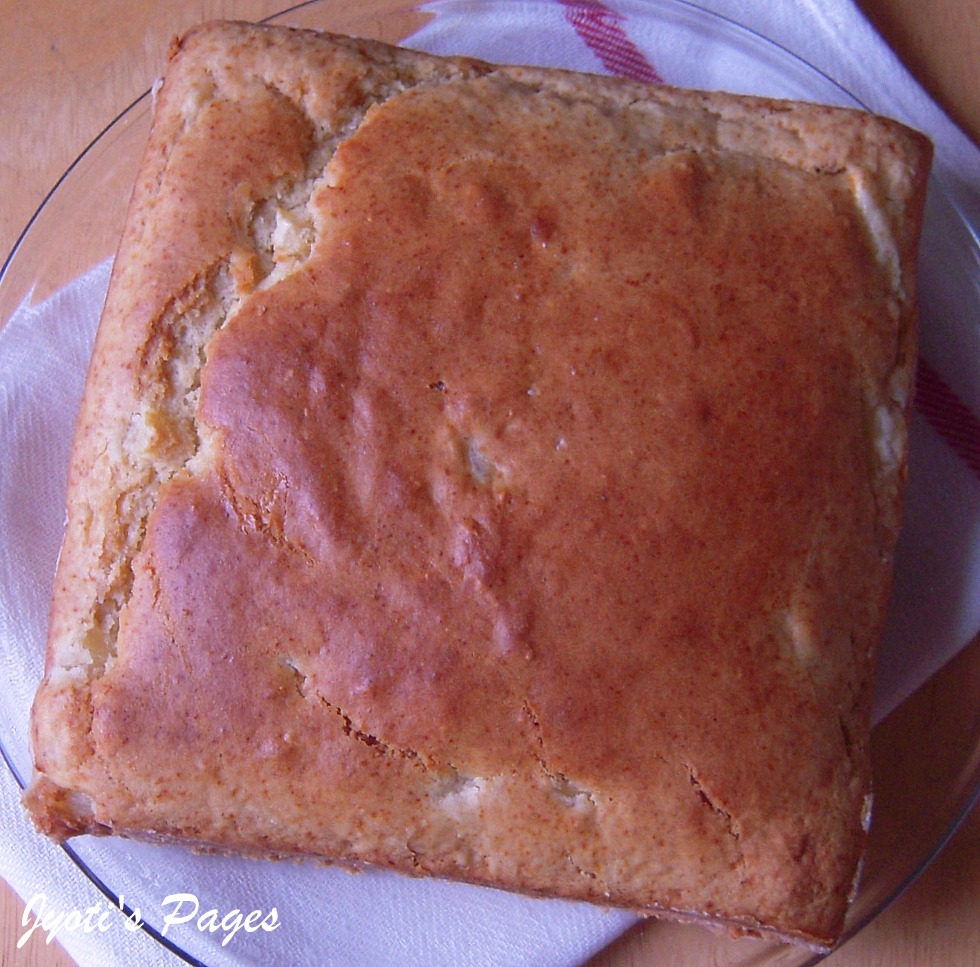
Here is a piece for you. ;-)!


Thank you for stopping by! Cheers!

Saturday 5 March 2011

Egg less Almond and Cherry Cake

I love baking and keep experimenting new recipes. But, the main constraint is my baking experiments is that I do not use eggs. Now, that is a vital ingredient in baking. So, I am always in the search of eggless recipes and sometimes try my own ideas to create some. 

One of the basic recipes of making an egg less sponge cake is using sweetened condensed milk (Hopefully, I will post it sometimes in near future). In India, it is a very common recipe in every vegetarian household. I have tweaked that recipe to come with this Egg less Almond and Cherry Cake.


Most of the time my DH and my friends are the scapegoat to taste my experiments. I had made this one for a tea party at one of my friends place. It tasted good and my friends liked it. Coming to the recipe now:


Almond and Cherry Cake:
(Click here for the printable version)
Ingredients:

1 cup AP Flour.
1/4 cup ground almond powder.
1/2 cup glace cherries.
1 tsp baking powder.
1/2 tsp baking soda.
1/4 cup butter.
1/2 cup + 2 tbsp condensed milk.
2 tbsp flaked almonds for garnishing.
About 1/2 cup milk (more or less)


Process:

1. Grease a 1 lb loaf tin or an 8" rouns cake tin and flour it.
2. Shift flour, almond powder, baking powder and baking soda 2-3 times so that the mixture is uniform.
3. Wash the glace cherries and wash off any syrup sticking to it. Pat them dry.
4. In a separate large bowl cream the butter and condensed milk, till it is well mixed and the mixture is light and creamy.
5. Add the dry mixture to the creamed butter and condensed milk mixture, mixing all the time. Add the milk little by little to get a dropping consistency batter.
6. Fold in the washed and dried glace cherries and spoon the mixture into the prepared tin. Sprinkle the flaked almonds over it.
7. Bake it at 180 C for 25 minutes and then lower the tempreture to 165 C and bake for another for 10 minutes, till the top is light golden and a skewer inserted in the middle comes out clean.


8. Cool it in the tin before taking it out on a wire rack. Cool completly on a wire rack before slicing.
9. Slice and serve. Enjoy!

Notes:

1. If you do not have almond powder, try using equal amount almond puree ( almonds, soaked, blanched and pureed). Beat it into the creamed condensed milk and butter and proceed.
2. The almond flavour in this cake is mild, for a stronger flavour try adding 1/2 tsp almond extract (not essence as it has a very fake flavour).

Linking it to Champa's Bake Off.