Search This Blog

Showing posts with label Recipes. Show all posts

Tuesday 16 January 2018

Eggless Double Chocolate Muffins | How to Bake Eggless Double Chocolate Muffins from Scratch

Eggless Double Chocolate Muffins | Made with wholewheat flour this is quite a healthy recipe and it tastes awesome | www.jyotibabel.com | how to make eggless double chocolate muffins from scratch

This recipe for eggless double chocolate muffins has been long due. It has been sitting in my drafts for some months now. Since I have been somewhat occupied with a new project, this food blog of mine is suffering from some lack of attention. Half of the first month of the new year 2018 has elapsed and nothing had been posted here till now. I decided that I need to do the needful today and this recipe from my drafts has come to my rescue.

This recipe is a simple one and it is a healthy one as there has been no use of refined flour. I have used regular sugar, but you can go ahead and use brown sugar to make it even healthier and guilt-free. They go well with a cup of coffee. So, if you are planning a meet up with friends over coffee, this is one recipe you can try.

Wednesday 6 December 2017

Bombay Masala Sandwich Recipe | How to make Bombay Masala Sandwich

Bombay Masala Sandwich Recipe | A very popular roadside snack from the city of Mumbai, India. www.jyotibabel.com. Check the recipe to know how to make Bombay Masala Sandwich
Bombay Masala Sandwich #Recipe

Bombay Masala Sandwich is a very popular roadside snack from the city of Mumbai. Between two grilled bread slices smeared with a generous amount of green chutney and butter is a spicy potato mixture topped with onion and tomato slices and grated cheese. The roadside vendors are very generous when it comes to filling it and topping it with cheese. I, however, exercise caution when I make it at home. However, if you like it cheesy you can be as generous as you like!

It is best to have this sandwich when it is freshly made - crisp and hot, along with a cup of masala chai.

Tuesday 5 December 2017

Jhaal Muri | How to Make Jhaal Muri from scratch | Street Food Recipes

Jhal Muri Recipe - A healthy and easy snack recipe to munch on from the streets on Kolkata| www.jyotibabel.com
Jhaal Muri #Recipe
Jhaal Muri is another popular street food from the state of Bengal. It is a light snack and is quite healthy too. ‘Jhaal’ in Bengali means ‘spicy’ and ‘muri is puffed rice – and it translates to spicy puffed rice. In the streets of Kolkata, the street vendors prepare them instantly and serve them in newspaper cones. With chopped onion, tomato, boiled potatoes, peanuts, sev bhujia, mustard oil and a blend of spices, it is a delightful snack to munch on. Using mustard oil is a must, as it imparts the dish its characteristic taste. While it might look somewhat similar to Bhel Puri, it’s taste is altogether different.

Monday 4 December 2017

Ghugni Chaat | How to Make Ghugni from Scratch | Recipe


Ghugni Chaat | How to Make Kolkata Style Ghugni Chaat at home | www.jyotibabel.com
Ghugni Chaat #Recipe


Ghugni Chaat is one of the most loved street foods from the lanes of Kolkata. And contrary to the popular belief about street foods, it is quite a healthy protein packed dish to indulge in. Try any area in Kolkata that is famous for its street food, you are bound to find a conspicuous vendor selling Ghugni.

In simple words, ghugni is a spicy curry made from dried white peas (that has been soaked for at least 6 hours or overnight) topped with chopped onions, tamarind chutney, a handful of coriander leaves and a specially roasted masala. Ghugni is to Kolkata what chole chaat is to Delhi. It is one of those dishes I make when I am running out of veggies in my pantry. With just a few ingredients, you can have a hearty and tummy satisfying meal.

When I was in school, there was a vendor who could come to our school park to sell ghugni during lunch breaks. From what I remember, there used to be a huge crowd surrounding his cart – all enjoying a plate of hot ghugni chaat. Back then I was quite averse to street foods since I was not sure what kind of hygiene standards they maintained. So, I never bought a plate of ghugni from him. Although today I enjoy having street food from street vendors, I am still very choosy. Well, that’s just me. These days whenever I crave street food, I end up making it at home.

Looking for more street food options, check out the recipe for

Ghugni Chaat | How to Make Kolkata Style Ghugni Chaat at home | www.jyotibabel.com

How to make Ghugni Chaat at home

Ingredients:
1 cup dried yellow peas
1 large onion, chopped
2 tsp ginger-chilli paste
1 tsp garlic paste
1 tsp cumin powder
2 medium tomatoes blanched and pureed.
1 large boiled potato, boiled, peeled, and mashed roughly.
A pinch of hing
1 tbsp oil
¼ tsp turmeric powder
½ tsp chilli powder
Salt to taste

To serve:
Chopped onion
Chopped fresh coriander
Lemon slices
Specially roasted masala (bhaja masala)

In order to prepare the roasted masala, take 2 tbsp cumin, 1 tbsp coriander seeds and 2 whole red chillies. Dry roast it in a pan over medium heat till they change colour. Grind it into a coarse powder in a pestle and mortar. Add 1 tsp of black salt and mix. Store it in an airtight container and use as needed.

Method:

1.       Wash the dried yellow peas and soak them in fresh water for 6 hours or overnight.
2.       In order to cook the peas, add the drained yellow peas to a pressure cooker and water such that the peas are covered in water. Add ½ tsp salt and cook it on high until one whistle. Wait till the pressure is released and open the cooker.
3.       Heat a Kadhai, add oil and when it is heated add hing and cumin seeds. Will the cumin seeds splutter, add ginger-chilli paste, garlic paste and stir. After a few seconds add the chopped onions and a pinch of salt. Cook till the onions are translucent. It will take about 3-4 minutes.
4.       Now add the tomato puree and stir. Add the turmeric powder, chilli powder, cumin powder and stir again. Cook till the tomato puree leaves oil in the sides.
5.       Now add the cooked peas and mashed potato. Give it a good stir. Check the spices. Add more if necessary. Bring it to a boil and then cover and lower the heat. Cook for about 5 minutes. When done turn off the heat.
6.       To serve, add the ghugni to a deep plate. Top it with a dash of lemon juice, tamarind chutney, chopped onion, chopped coriander, and the specially prepared roasted spice mix. Serve it hot.

Ghugni Chaat | How to Make Kolkata Style Ghugni Chaat at home | www.jyotibabel.com

This post is a part of the Blogging Marathon under the theme 'Make Street Food at Home'.

BMLogo 
Check out the Blogging Marathon page for the other Blogging Marathoners doing this BM#83

Tuesday 29 August 2017

Paneer Veggie Grilled Sandwich Recipe | How to Make Paneer Veggie Grilled Sandwich | Weekend Breakfast Recipe Ideas

Paneer Veggie Grilled Sandwich is a lip-smacking, easy to make sandwich and can be made under 30 minutes. www.jyotibabel.com
Paneer Veggie Grilled Sandwich #Recipe

Paneer Veggie Grilled Sandwich is a lip-smacking, easy to make sandwich. With just a handful of ingredients, you can have a filling dish for breakfast in under 30 minutes.

Can you resist the taste of golden, crisp, grilled sandwich with a cup of hot tea?

Grilled sandwiches are a regular fare during weekends in my house. So, on the 2nd day of Week#4 of BM# 79 under my chosen theme of 'Weekend Breakfast Ideas', I am sharing the recipe for a much loved Paneer Veggie Grilled Sandwich. I use freshly made homemade paneer in making the filling for this sandwich. However, you may use grated ready to use paneer also and it will make the process faster.

Let's checkout the recipe below:

Paneer Veggie Grilled Sandwich

Ingredients:

8 brown bread slices

For the filling:
1/4 cup freshly made paneer
3 tbsp chopped capsicum
1 small carrot, grated
1 small green chilli finely minced
2 tbsp chopped coriander
Salt and pepper to taste
1 tsp tomato sauce

To assemble:
green chutney
tomato ketchup
butter to grease


Paneer Veggie Grilled Sandwich is a lip-smacking, easy to make sandwich and can be made under 30 minutes. www.jyotibabel.com


Method:


1. In a bowl, add all the ingredients for the filling and mix. Taste for seasoning and adjust accordingly. Set aside.
2. Apply butter on one side of each bread slice. On the unbuttered side of 4 bread slices apply green chutney and on the remaining 4 slices apply tomato ketchup.
3. Take the slices with green chutney side up and spread the prepared paneer filling. Cover with the bread slices smeared with tomato ketchup with buttered side up. Repeat the same with the rest of the bread slices.
4. Grill them on a sandwich maker till golden lines appear on both sides. Slice them into two halves.
5. Serve hot with ketchup and green chutney and a cup of hot masala chai. Enjoy!


If you like sandwiches check out my Bombay Masala Sandwich Recipe.

BMLogo


Thank you for stopping by! Cheers!

Friday 25 August 2017

Club Kachori Recipe | How to Make Club Kachori | Special Weekend Breakfast Recipe

Club Kachori is a quite a famous weekend breakfast dish from the city of Kolkata. These are bite sized puri served with spicy potato curry. Find the recipe on www.jyotibabel.com
Club Kachori #Recipe

Club Kachori is a quite a famous weekend breakfast dish from the city of Kolkata.

Anyone who has lived in Kolkata for a while will know about this quite popular weekend breakfast dish - Club Kachori. This dish is DH's favourite and whenever he is in Kolkata, he doesn't miss to indulge gorging on it for breakfast at a popular snack shop in the locality.

For the uninitiated, the name of this dish can be a little misleading. The kachoris here are not like the khasta kachori which are well known all over India; they are more like bite-size puri. But, there is a difference. Into the dough of these kachoris, goes coarsely urad dal paste, suji, little chilli and ginger paste and some hing which gives it its characteristic taste

These kachoris as deep fried and are served with a spicy potato curry. In some places, pumpkin is also added to the curry. Panchporan - a Bengali whole spice mix added to this curry, makes it taste a little different from the regular potato curry.

Typically, maida is used to make the kachoris, but at home, I use atta (chapati flour) to make them.
Without much ado, let's check out how to prepare Club Kachori Kolkata style.

This is the first recipe I am posting under Weekend Breakfast Theme of BM#79

Club Kachori is a quite a famous weekend breakfast dish from the city of Kolkata. These are bite sized puri served with spicy potato curry. Find the recipe on www.jyotibabel.com


Club Kachori Recipe

Ingredients:

For the Kachori/Puri

2 cups atta
¼ cup suji/semolina
2 tbsp oil
¼ cup urad dal washed and soaked in water for at least an hour
¼ tsp hing/asafetida
1 tsp chilli paste
1 tsp ginger paste


For the Potato Curry:

6 medium-size potato, boiled, peeled and chopped
2 tomatoes, blanched, peeled and pureed
2 cloves of garlic, grated
1 green chilli, chopped
1 tsp ginger paste
2 tbsp oil
1 tsp cumin seeds
¼ tsp hing
½ tsp each of sauf, methi seeds, ajwain, kalonji and rai (panchporan)
1 red chilli
½ tsp turmeric powder
1 tsp red chilli powder, or to taste
2 tsp coriander powder
Salt to taste
½ tsp amchur
½ tsp garam masala
1 tsp kasuri methi
Handful of coriander leaves
Club Kachori is a quite a famous weekend breakfast dish from the city of Kolkata. These are bite sized puri served with spicy potato curry. Find the recipe on www.jyotibabel.com


Process:

1.       Drain the soaked urad dal and grind coarsely in a grinder. In a mixing bowl, add the coarsely ground urad dal paste, atta, suji, oil, hing, salt, chilli and ginger and using water as need, knead a firm dough. Cover it and set it aside.
2.       To make the potato curry heat oil in a pan, add hing, jeera, red chilli, green chilli, ginger and garlic and sauté for a few seconds. Now add sauf, methi seeds, ajwain, kalonji and rai and stir so that they start crackling. Now add the tomato puree. Cook for about a minute and then add the chilli powder, turmeric powder, salt, and coriander powder. Cook for a couple of minutes. When you see oil leaving its side, add the potatoes. Stir. Now add 1 cup of water. Stir and bring it to a boil.
3.       When it comes to a boil, the gravy will also start thickening, add garam masala, amchur and crushed kasuri methi and stir. If needed add little more water, cover and bring to a boil.
4.       Check for spices, adjust if needed. When done, add chopped coriander leaves and take it off the flame.
5.       In order to make the kachori/puri, divide the dough into small balls (little bigger than marbles). These kachoris are about 2 inches in diameter.
6.       Roll them into thick rounds (little thicker than puri). Thin ones do not puff well.
7.       Heat oil in a Kadhai and when the oil is heated enough, fry them 2-3 at a time (depending on the size of your Kadhai) on high heat. When it is brown on one, flip and fry the other side for a few seconds. Drain them on paper towel. Repeat the process till you have used all the dough.
8.       Serve the potato curry with these hot kachori/puri along with a dollop of achar, sliced onion and some tomato and cucumber slices for a filling weekend breakfast/ brunch.

Notes:
1. Do not roll them too thin or too big, else they will not puff well.
2. Always fry these kachoris on a high heat, it helps them in puffing. Once they puff up, you can lower the heat and fry till they are golden.

Looking for more Weekend Breakfast Recipe Ideas, check out
Bombay Masala Sandwich Recipe
Paneer Veggie Grilled Sandwich Recipe

BMLogo

Thursday 17 August 2017

Penne Pasta in Red Sauce with Veggies Recipe | How to Make Penne Pasta in Red Sauce with Veggies | Italian Recipes

Penne Pasta in Red Sauce with Veggies Recipe | How to Make Penne Pasta in Red Sauce with Veggies | Italian Recipes. More such recipes at www.jyotibabel.com
Penne Pasta in Red Sauce with Veggies #Recipe 
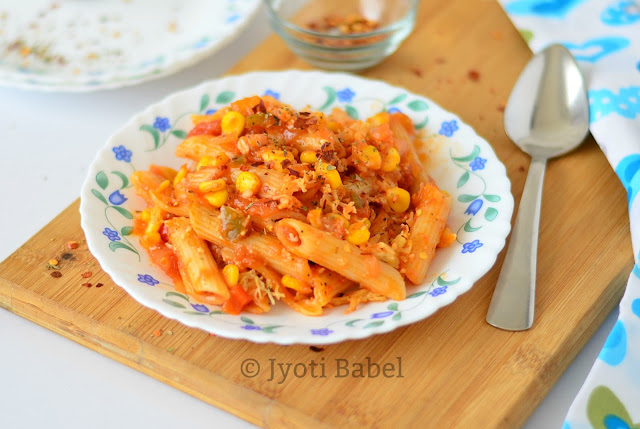
Penne Pasta in Red Sauce with veggies is a regular dish in my household. On days when I am not in the mood to cook an elaborate Indian meal with roti, subji, dal and chawal, it comes to my rescue. They not only make for a filling meal but can be made relatively faster. The recipe I am sharing today is that of penne pasta in the red sauce along with some veggies. I have added just capsicum and sweetcorn, but if you are not pressed for time, you can add many more veggies - anything that catches your fancy.

I always prefer to bake my pasta for the final cooking. First I boil the pasta in water till they are just done. When the sauce is ready and I toss in the pasta, cook on stove top for a couple of minutes and then transfer it all in a casserole, top it with cheese and bake it for 15-20 minutes. I think this way flavour of the sauce seeps into the pasta making it taste great.

I am sharing this recipe under Summer Casserole Dishes Theme of Week#2 of BM#79.

Penne Pasta in Red Sauce with Veggies Recipe | How to Make Penne Pasta in Red Sauce with Veggies | Italian Recipes. More such recipes at www.jyotibabel.com

Penne Pasta in Red Sauce with Veggies Recipe

Ingredients

2 cups cooked penne pasta
1½ cup fresh tomato puree
¼ cup tomato ketchup
¼ cup finely chopped onions
1 tsp garlic paste
½ cup chopped capsicum
½ cup boiled sweet corn 
Salt to taste
1 tbsp sugar
2 tbsp oil
2 tbsp butter
2 tsp dried oregano
1 tsp dry red chilli flakes
¼ to ½ cup grated cheese

Penne Pasta in Red Sauce with Veggies Recipe | How to Make Penne Pasta in Red Sauce with Veggies | Italian Recipes. More such recipes at www.jyotibabel.com
Process:

1. Heat oil in a pan. Add the butter, followed by chopped onion and garlic and sauté on a medium flame for 2 minutes.
2. Add the chopped capsicum and cook it covered on a medium flame for 2 to 3 minutes. Add the fresh tomato puree and salt and cook it for 5-7 minutes. Stir in between.
4. When it looks a bit cooked, add tomato ketchup, oregano, chilli flakes and sugar. Stir well and cook on a medium flame for about 7 to 10 minute. The red sauce should be nice and thick by now.
5. Add the cooked pasta, boiled sweet corn and gently toss everything and cook on a medium flame for 2 more minutes. The pasta should be well coated with the sauce.
6. Transfer the pasta in a casserole that has been pre-greased with butter. Top it with grated cheese and bake it in a preheated oven at 180 C for 15-20 minutes. Serve hot. Enjoy!

Penne Pasta in Red Sauce with Veggies Recipe | How to Make Penne Pasta in Red Sauce with Veggies | Italian Recipes. More such recipes at www.jyotibabel.com

Notes:

1. You can add any other veggies of choice like broccoli, mushrooms, baby corn, etc.

Looking for a dessert ides to go with this meal, check out my molten lava chocolate cake.

BMLogo

Monday 14 August 2017

Lebanese Beans Salad | How to make Lebanese Beans Salad | Salad Recipes


Lebanese Bean Salad | Lebanese Beans Salad is a simple, flavourful salad but is power packed with protein. Check out the recipe at www.jyotibabel.com
Lebanese Beans Salad #Recipes
Lebanese Beans Salad is a simple, flavourful salad but is power packed with protein. Beans are extensively used in Lebanese cuisine and this salad is one of the great ways to add some veggies and beans to your diet.

I was very much hoping that I would be able to keep up with my schedule for the blogging marathon this month. I had been taking part in it since last 2 months so that I could keep this blog running. But, this month my schedule went haywire. A little lack of planning on my part and some unexpected writing assignments that came my way kept me busy and this little space was ignored. I am going to make up for it and will be posting my recipes here now.

My chosen theme for week #1 is Lebanese cuisine and as a part of it, I had posted my version of Fattoush Salad and a recipe for Hummus (without Tahini). The third and final recipe for the 1st-week theme is this 'Lebanese Beans Salad'.

Let's check the recipe now.

Lebanese Beans Salad

Ingredients:

1 cup boiled chickpeas
1 cup boiled red kidney beans
1 large onion, finely chopped
2 tomatoes, cut into chunks
1 medium cucumber, peeled and cut into chunks
a handful of coriander leaves, chopped
a handful of mint leaves, chopped

For the dressing
Juice of 1 lemon
2-3 tbsp olive oil
1 clove garlic finely crushed
salt and pepper to taste

Lebanese Bean Salad | Lebanese Beans Salad is a simple, flavourful salad but is power packed with protein. Check out the recipe at www.jyotibabel.com


Process:

1. Mix all the ingredients of the dressing in a bowl and whisk nicely.

2. In a large bowl add the salad ingredients and drizzle over the dressing. Shake well so that the dressing is well incorporated.

3. Cover the bowl and let it rest for at least half an hour in the refrigerator. Take it out, shake it and serve.

Notes:

1. If you are using canned beans, make sure you rinse them well with water before adding to the salad.

2. When using dried beans, soak the beans overnight and cook separately in a pressure cooker till they are thoroughly cooked but not mushy.

BMLogo

Saturday 5 August 2017

Fattoush Salad | How to Make Fattoush Salad | Lebanese Recipes | Salad Recipes


Fattoush Salad Recipe | Fattoush Salad is a Lebanese bread salad - greens, veggies and toasted pita bread pieces are the main ingredients. www.jyotibabel.com
Fattoush Salad #Recipe

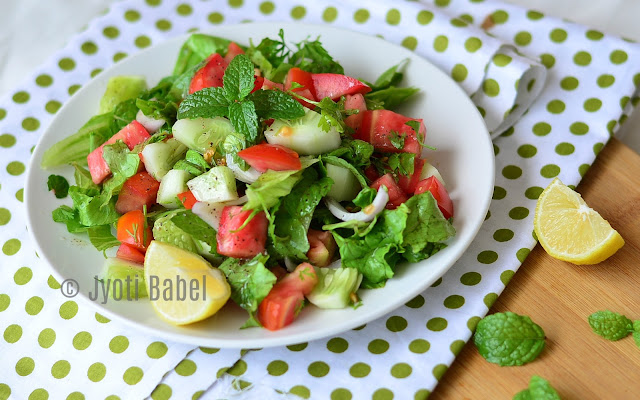
Fattoush Salad is a Lebanese bread salad - greens, veggies and toasted pita bread pieces are the main ingredients. But, I have never loved bread croutons in my salad and for that reason, I have skipped the toasted pita chips in the fattoush salad I made.

The dressing for fattoush salad has two vital ingredients among others - sumac and pomegranate molasses. Sumac is tangy dried powder made from a kind of Middle Eastern red berry. Pomegranate molasses as the name says is made from pomegranate and is a commonly used ingredient in Middle Eastern cooking. I didn't have both these ingredients at hand, so I made the dressing without them. I have read that these two ingredients can make a lot of difference to the salad and I will surely try them whenever I get to buy them.

I did search about making pomegranate molasses at home and there were many links that said you could make it by cooking pomegranate juice over a low heat for a long time. But, then I am really wary of cooking fruit juices. So, I dropped the idea and went ahead to make my customised Fattoush Salad.

Last month had been an indulgent one for me foodwise. If you have checked my last month's posts, you will notice I posted mostly sweet dishes - brownieskheerpeda. All that was part of the themes I chose to do for that month's blogging marathon.

But, the result is now seen when I stand on the bathroom scale!

Such is the life of a food blogger - I want to cook all the delicious dishes in the world, but then I have to take some steps back as ultimately I will be on the receiving end.

So, for this month, I decided I would blog about something really healthy. My chosen theme for the first week of BM#79 is Lebanese cuisine. And today I am posting the recipe for Fattoush Salad, albeit a customised one.

Let's check out how I made my Fattoush Salad.


Fattoush Salad Recipe

Inspired from here

Ingredients:

4-5 Romaine Lettuce leaves washed and chopped
1 large tomato, chopped in chunks
1 small cucumber, chopped in chunks
1 small onion, sliced
a handful of mint leaves
a handful of coriander leaves, chopped
1 cup chopped pita bread pieces toasted ( I didn't use)

Dressing:
2 tbsp extra virgin olive oil
3-4 tbsp lemon juice
1 clove of garlic finely chopped
salt and pepper to taste
1/4 tsp sumac ( I didn't use)
2 tsp pomegranate molasses ( I didn't use)

Process:

1. Mix all the ingredients for the salad dressing in a bowl and whisk nicely.
2. Mix all the salad ingredients except toasted pita bread pieces.
3. Right before serving, add the dressing to the salad. Top it with pita chips (if you like) and serve immediately.

BMLogo

Thursday 27 July 2017

Instant Peda Recipe | Peda Recipe with Milk Powder and Condensed Milk

Instant Peda Recipe | Peda is rich milk fudge make from khoya and flavoured with cardamom or saffron. In this instant peda recipe, we will make it with milk powder and condensed milk. www.jyotibabel.com
Instant Peda #Recipe

 Peda Recipe with Milk Powder and Condensed Milk

Peda is rich milk fudge flavoured with cardamom or saffron. It is also one of the favourite sweets of Lord Ganesha. So, it sells like hotcakes during Ganesh Chaturthi.

For the 2nd day of Week 4 of Blogging Marathon under the theme ‘Special Day/Festival’, I am posting the recipe for this much loved Indian sweet – Peda.

Traditionally Peda is made with khoya and sugar. Making khoya from milk is a painstaking process where you have to heat milk on low flame for a prolonged time so that all the liquid from the milk evaporates, leaving behind a dense and rich khoya. My mom makes peda from scratch and it is really a long process. You have to be really patient to make it that way.

The recipe I am sharing today is quite instant – by using milk powder and condensed milk you can prepare delicious peda in just 15 minutes. I browsed a lot of YouTube Videos before finally trying it out.

The first time I tried it, I heated the mixture little longer than necessary, so they came out little hard – but they tasted good nonetheless. So, I tried it again and this time they came out semi-soft but not soft like malai peda. But, they were good enough.

Instant Peda Recipe | Peda is rich milk fudge make from khoya and flavoured with cardamom or saffron. In this instant peda recipe, we will make it with milk powder and condensed milk. www.jyotibabel.com

Instant Peda Recipe

Ingredients:

200 g milk powder
200 g condensed milk
3 tbsp ghee
4 cardamom pods, crushed and finely powdered

Process:

1.       In a non-stick pan on medium flame add ghee. To it add the milk powder and condensed milk and using a spatula stir well such that the mixture is uniform and well mixed.
2.       Keep heating the mixture on medium heat for about 10-12 minutes and using the spatula keep tossing and turning the mixture as it cooks.
3.       Add the cardamom powder and mix well. Take it off heat. At this point, the mixture should resemble smooth soft dough.
4.       Take the dough out into a clean bowl and let it cool down a little.
5.       When the dough has cooled enough to handle (but not completely cold), grease your palm with little ghee and form small bite-size balls.
6.       I used terra cotta moulds to get the design impression on the peda. If you have such moulds, you can do the same. Else you can just flatten the balls a bit and put a finger impression.
7.       If you like you can garnish them with chopped pistachios.


Notes:
1.       These pedas were semi-soft with a chewy taste – but not soft like malai peda. If you like these a little hard, you can heat the mixture for another 5 minutes.

2.       It is very important to keep stirring the dough while cooking, else it can get brown.

Thank you for stopping by! Cheers!


If you are on social media, take a minute to follow me there for all sorts of recipe updates.


BMLogo

Wednesday 19 July 2017

No Bake Dates & Nuts Brownies | No Bake Brownie Recipe

No Bake Dates and Nuts Brownies | A healthy, quick and raw brownie made with a handful of ingredients. www.jyotibabel.com
No Bake Dates and Nuts Brownies. #Recipe


No Bake Dates and Nuts Brownies is the answer if you are looking for a healthy and quick snack to munch on.

I had long wanted to try a no-bake brownie. But, being an ardent chocolate lover I had my doubts if such a brownie will be worth the try.

Well, we will never know about it unless we try. So for the 3rd day of the blogging marathon under the 'brownie theme,' I decided to try yet another version of our beloved brownies - No Bake & Raw Dates and Nuts Brownies.

I used this recipe as an inspiration to come up with my version. I didn't use chocolate ganache as I wanted to make it as healthy as possible. 

Let's check the recipe:

No Bake Dates and Nuts Brownies.

Ingredients:

1 cup dates, pitted and halved
1/2 cup almonds
1/4 cup walnuts
2 tbsp cocoa powder
1 tbsp Bournvita powder (optional)

Process:

1. Line a 6 inch tin with parchment paper and set aside.
2. In a blender jar, add the pitted dates and blend it till it looks like a fudgy mess. Take it out into a large bowl.
3. Now finely powder the almonds in the same jar, followed by walnuts. I then added them together again in the blender jar together for a quick mix.
4. Add it to the bowl again, add cocoa powder and bournvita powder (if using). Using a spatula mix it and then tip it into the parchment-lined cake tin.
5. Spread it evenly and press it to get an even surface. Dust some cocoa powder or bournvita powder over the set brownies.
6. Let it sit for 10 minutes and then slice it. They are ready to devour.


No Bake Dates and Nuts Brownies | A healthy, quick and raw brownie made with a handful of ingredients. www.jyotibabel.com

Here are my thoughts on the No Bake Dates & Nuts Brownies

1. For those looking for really healthy brownies, it is a good choice. You can alter the quantities of nuts to suit your taste. Walnuts might give a slightly bitter taste in the end. So, you can use just 2 tbsp of it or skip altogether.

2. I think they tasted best after a day. The first day they tasted like dates and nut bar. But, on the second day, the flavour of cocoa was more pronounced giving it a good chocolatey taste.

3. If you want to make it more decadent, go ahead and cover the brownies with a layer of chocolate ganache. Or you might add some ganache into the dates and nuts mix. In that case, you might have to let the set brownies rest for a while before you slice to get neat slices.

No Bake Dates and Nuts Brownies | A healthy, quick and raw brownie made with a handful of ingredients. www.jyotibabel.com

Want to try some other brownies? I have got you covered. Check these recipes.


Thank you for stopping by! Cheers!

If you are on social media, take a minute to follow me there for all sorts of recipe updates.


BMLogo

Tuesday 18 July 2017

Bourbon Biscuit Brownies | Easy Bourbon Biscuit Brownie Recipe


Bourbon Biscuit Brownies | A simple quick-fix brownie recipe where bourbon biscuits is the star ingredient. www.jyotibabel.com
Bourbon Biscuit Brownies #Recipes

These Bourbon Biscuit Brownies are perfect for days when you have a sudden urge to have brownies, but do not have any ingredients on hand to bake it? Or maybe you want to bake a brownie but do not have the time to follow a super lengthy recipe.

If you have ever faced such a situation, then this recipe will come to your rescue. For the 2nd day of my brownie theme Blogging Marathon, I decided to post this quick-fix brownie recipe. With just a handful of ingredients making brownies this way is a breeze.

This is cheat's version where bourbon biscuits are used as a vital ingredient – no need for additional flour, sugar, or butter. Looks too good to be true, try the recipe yourself.


Bourbon Biscuit Brownies | A simple quick-fix brownie recipe where bourbon biscuits is the star ingredient. www.jyotibabel.com

Bourbon Biscuit Brownies

Ingredients:

200 grams Bourbon biscuits
50 grams digestive biscuits
2-3 tablespoon Bournvita powder
1 tbsp cocoa powder
About  ¾ cup +2 tbsp milk
1 tsp plain Eno Fruit Salt 
Butter or oil to grease the pan

Process:

1. Preheat the oven to 180 C. Grease an 8” square cake tin and line it with parchment
2. In a mixer jar, add the broken digestive biscuits, bourbon biscuits and churn it into a powder.
3. Take a large bowl and tip in the biscuit powder, add Bournvita powder, cocoa powder, and stir. Add milk little by little and whisk to get a smooth batter.
4. Add the Eno Salt to the batter and give it a quick stir. Pour the batter into the prepared tin and bake in the preheated oven for 20-25 minutes.
5. When baked, insert a skewer in the middle to see it comes out clean.
6. Take it out of the oven and let it cool down for 10 minutes. You can then lift the brownies out of the pan along with the parchment.
6. Once, the brownie has cooled down to room temperature, slice it into squares and serve with a generous drizzling of chocolate sauce.

Bourbon Biscuit Brownies | A simple quick-fix brownie recipe where bourbon biscuits is the star ingredient. www.jyotibabel.com

Notes:

1. These brownies are not intensely chocolatey. So, it is best to serve them with a drizzle of chocolate sauce.

2. You can also add 1/2 cup choco chip or chocolate chunks in the batter for an intense chocolate flavour.

3. This recipe should also work with any other chocolate flavoured cream biscuits, like oreo, etc. Instead of digestive biscuits Marie biscuits or Milk Bikies can also be used.

Still, want to try making brownies the traditional way – check out some other recipes already posted here.

BMLogo

Monday 17 July 2017

Eggless Fudge Brownie with Beets | Eggless Beetroot Chocolate Brownies Recipe

Eggless Fudge Brownie with Beets is a winner recipe. Quite healthy, easy to make and tastes quite awesome. www.jyotibabel.com
Eggless Fudge Brownie with Beets. #Recipe

Eggless Fudge Brownie with Beets is a winner recipe. Quite healthy, easy to make and tastes quite awesome.

If there is one thing that can make me forget all about conscious eating and diet control – it is chocolate. There are times when I do control myself from having that extra piece of the chocolate bar. But, on most occasions, it has the better of me. That’s why I prefer not having any chocolate bars at home. Perfect solution, isn’t it?

The intense chocolate flavour in fudge brownies is perhaps one of the reasons why I prefer them over cake any day. Give me a slice of soft, dense chocolatey brownie and I will wander into my chocolate nirvana. When I saw Srivalli had listed a brownie theme in the 78th edition of the Blogging Marathon, I instantly chose it.

I have already tried a number of brownie recipes and have shared a couple of them here. Check out these

Eggless Nutella Brownies
Eggless Chocolate Brownies
Eggless Fudge Brownies
One Bowl Eggless Brownies
Sinful Eggless Walnut Brownies
3 Minutes Microwave Brownies

Yet, there are so many brownie variations that are on my to-do list. I have seen many brownies with chocolate and beetroot combination doing rounds on the internet. So, I decided to try it myself. I used this recipe for fudge brownies as a standard and tweaked it to come up with this recipe. 

After having a slice of these beetroot fudge brownies, I realized beetroot and chocolate is a winning combination. There is no trace of any beetroot flavour. Unless you tell anyone, no one will ever make out this secret ingredient in the recipe. I used wheat flour and oil in this recipe to make it even healthier. Check out my recipe below.
Eggless Fudge Brownie with Beets is a winner recipe. Quite healthy, easy to make and tastes quite awesome. www.jyotibabel.com

Eggless Fudge Brownies with Beets

Ingredients:

½ cup whole wheat flour or atta
¼ cup Maida or all-purpose flour
3 tbsp cocoa powder
1 tsp baking powder
1 tsp instant coffee
100 g dark chocolate
½ cup beet puree
½ cup powdered sugar + 2 tbsp brown sugar
¼ cup oil
¼ cup whisked yoghurt
¼ cup to ½ cup water
2 tbsp chopped walnuts

Process:

1. Line an 8” square brownie pan with parchment paper and set aside. Preheat the oven to 180 C.

2. In a large bowl add atta, maida, cocoa powder, coffee, and baking powder. Use a whisk to mix everything together. Set aside.

3. Chop the chocolate into small pieces and add it to a medium microwave-safe bowl. Microwave it for 1 minute so that it melts. Whisk it to get smooth melted chocolate. To it add oil and stir. Add sugar and stir it again. Now add yoghurt and beets puree and whisk it nicely.

4. Add this wet ingredients mixture to the dry ingredients mixture. Add ¼ cup water and whisk to make a smooth batter. If the batter looks thick, add another ¼ cup water. Pour the batter into the prepared tin and top it with chopped walnuts.

5. Bake in the preheated oven for 25-30 minutes. When done, a skewer inserted in the middle should come out clean.

6. Let it cool for 10-15 minutes before you can lift it from the pan along with the parchment paper. Slice and serve.

Eggless Fudge Brownie with Beets is a winner recipe. Quite healthy, easy to make and tastes quite awesome. www.jyotibabel.com

Notes:

1. To prepare beets puree, I pressure cooked 2 medium beets. When cooled, I peeled and chopped them and churned in a mixer jar to get the puree.

2. For fudge brownies, I prefer lining the tin with parchment. Since fudge brownies are quite soft and mushy, it is easier to lift the brownies out of the tin along with the parchment.

3. Slice them after the brownie has cooled a bit for neat slices.

4. You can do away with the maida in the recipe and add whole wheat flour or oats flour instead.

5. You can also double the beets puree and omit the yoghurt and half the water amount to get red looking brownies.

6. I had run out my regular powdered sugar, so I used 2 tbsp of brown sugar. You can regular sugar too.

If you are on social media, take a minute to follow me there for all sorts of recipe updates.


BMLogo